Before we moved into our house we sanded all the hardwood floors and refinished them. It was a labor of lovely to say it lightly.
The process of sanding the floors was simple when we got it figured out and the hardest part was just the time it took. Nicole Curtis on DIY’s Rehab Addict show puts unrealistic thoughts in my mind, come to find out it takes more than a 30 minute show to get these floors updated! We sanded and swept and sanded and sanded and blew a few breakers then did more sanding. If you have ever been around someone sanding hardwood floors you know it is very loud. At times I felt like the whole house was vibrating. I remember at one point leaning up against the wall to rest and thinking the house must think we are crazy making this much noise and ruckus! Yet in the end it came out so beautiful, secretly I like to think the house smiled at us as we sanded, gutted and polished and felt loved again.
Below I have a more detailed story of the events we experienced but here is a quick rundown of our steps:
Removing all tack strips, lose nails and staples from the floors. If a piece of metal like a carpet tack is hit with the sander it can cause sparks as well as rip of the sand paper you are using.
Remove trim molding (the small molding that extends off the baseboard) label and store in a safe location. We saved our base shoe molding because it was original and we were staining the floors to match.
Removed existing varnish with a belt sander.
Using a high grit sand paper we sanded the edges and around curved trim pieces.
Vacuum and circle sanding marks with pencil
Remove sanding marks with low grit sand paper
Sweep and double check for sanding marks
Buff and sand with lowest grade sand paper
Allow dust to settle over night, final vacuum
Apply stain
Apply one coat of poly
Lightly sand/buffer
Apply second coat and allow to cure for a few days before walking on it.
Our beat up hardwood floors ready for some TLC!
Pulling carpet tacks took hours! This pour section of flour got water damage from a window left open and was littered with carpet tacks. It now looks like a brand new floor.
The stove and fridge got moved to the dining room while we stripped the floors in the kitchen.
Our sunroom after using just the orbital sander, a good start but needed to have the belt sander work on it.

We removed our base shoe molding while sanding and then put it back to keep the authentic feel in our house.
Before any sanding could happen we needed to prep our floors. A quick vacuum from our newly purchased shop vac cleaned up any unwanted dirt and debris. Then using a needle nose pliers we removed all loose nails and carpet tacks. Then we removed the base shoe pieces from each room. This is the small piece of molding the connects the trim and the floor by extending off the baseboard. We were refinishing the floors because they were in such bad shape but we wanted to keep it as original and authentic as possible. To help do this we carefully removed the base shoe one piece at a time, labeled it according to the room it was from and the order it was removed from the room. This way when all the sanding was done we could put these back exactly as they were placed there in the 1920's when this floor was put into the house. It also was helpful when we were picking a stain color to help match the original color.
Taking off and numbering the base shoe.
One of my favorite memories of sanding was when we removed the base shoe in the living room revealing the gap between the baseboard and floor. It was just enough that you could see the planks of wood underneath. When the house was built in the late 1860's-early 1870's there was a wide plank wood ( I think oak or hickory) running side to side on the main level in our house. During the roaring 20's the new owners of the house added a two story sunroom on the west side and laid small red oak planks running lengths wise to tie the rooms all together. When I put my hand in the gap to feel the old plank I found pieces of flour sacks and old newspaper they either laid in-between the floors or put in the gap for insulation. It was like reaching through time to someone who owned the same house and put their money, time and love into bettering this home.
We wore masks and ear plugs for this messy, loud job.
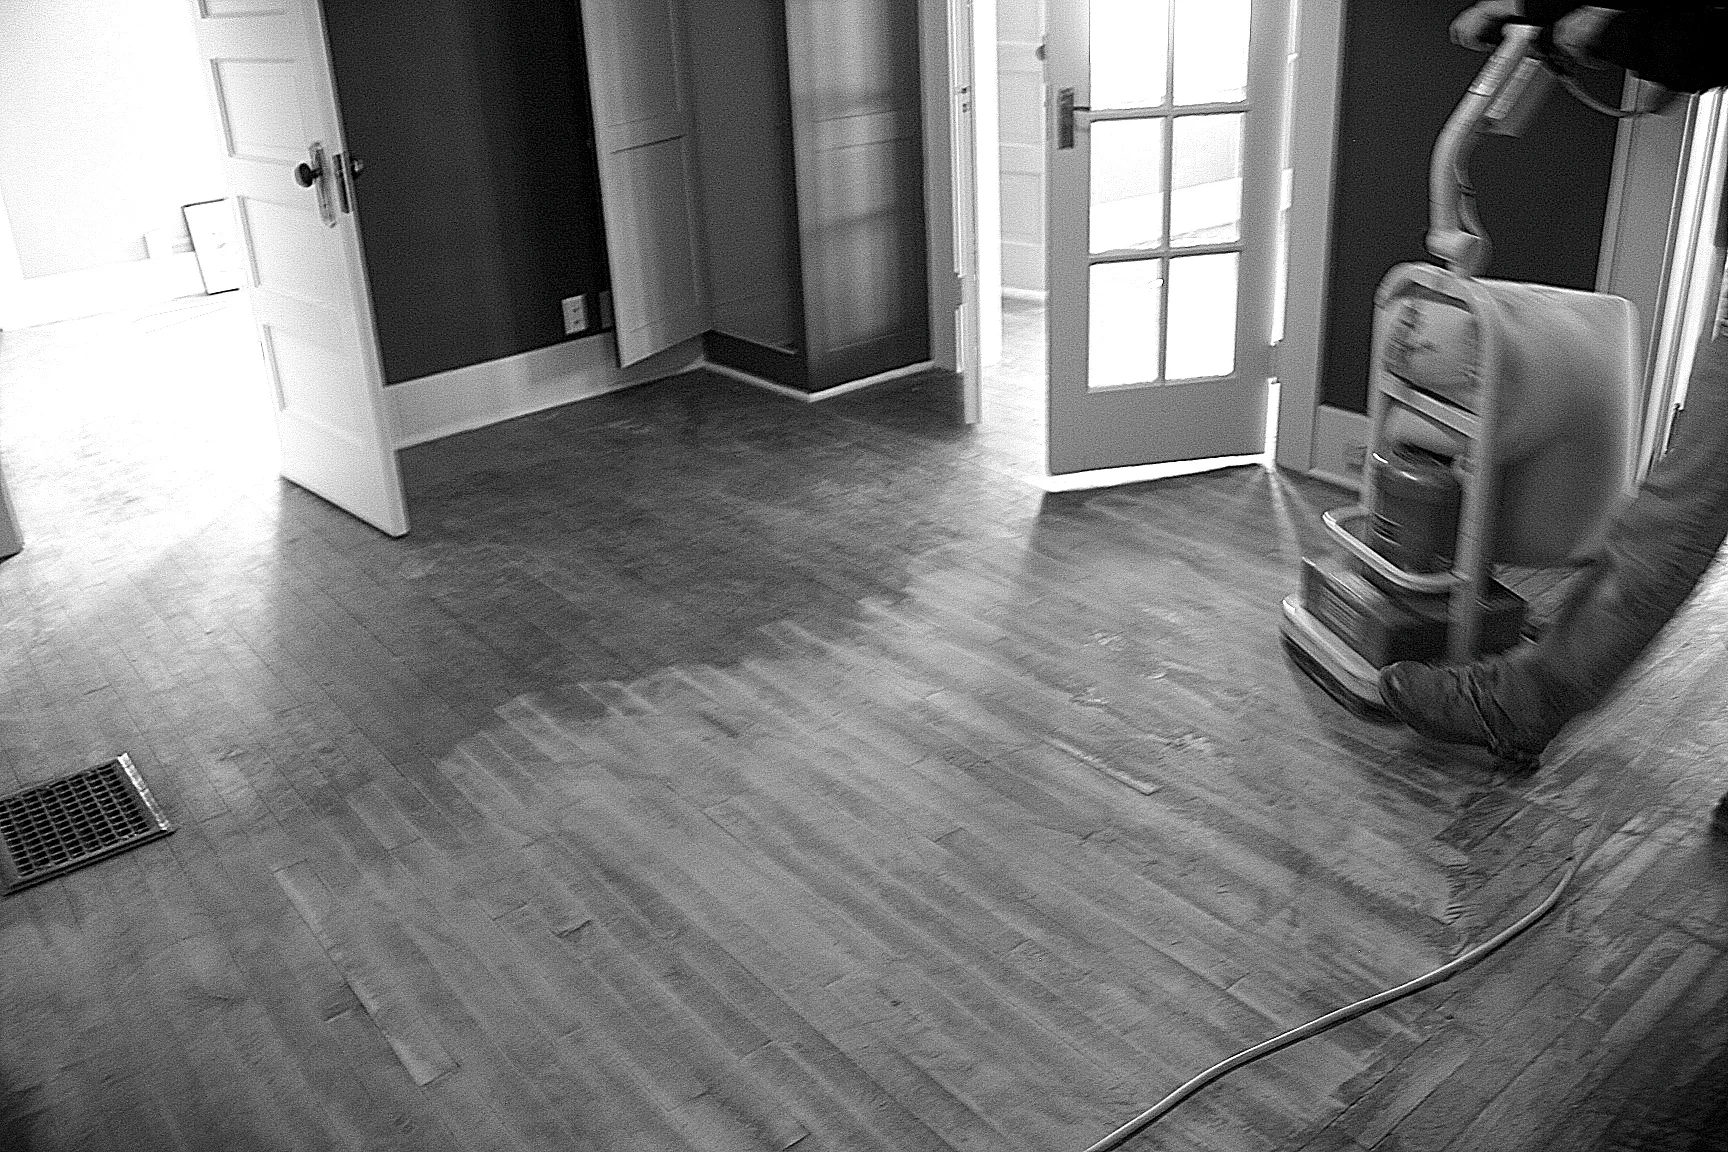
The orbital sander being used in the master and sunrooms.
The floors were so soft and shiny after years of wear and tear were removed.
We started out with an orbital sander and ended with a belt sander. The difference is an orbital sander basically vibrates while a belt sander is a big belt of sandpaper stripping the top layer off. If you touched a orbital sander while it was on it would hurt and maybe take a little skin, a belt sander would create an open wound. Our goal was to use the orbital at first because we did not want to take too much off of the floor, however after a day of work we realized it would never happen with an orbital. The floors in our house were last finished in the 1920's and while it needed to be done, there was still a pretty thick layer of finish on them. After doing some research and talking to some local people we found out that the finish on our floors was made with natural materials one of them being a milk product. What was happening with the orbital sander was as it vibrated the sand paper on the floor it created friction which created heat. This heat warmed up this natural milk based product and made it almost like a caramel/toffee substance (only is smelled and looked less edible) that stuck to the sanding pad. When our orbital sander full of this hot caramel like substance was moved from a warm area to a new cool area, the caramel substance cooled down and stuck back to the floor. We were not removing the finish as much as we were just transferring it from one location to another.
Using the belt sander to remove the original varnish..
Using the belt sander to remove the original varnish.

Sanding with 40 girt to clean up the sand lines/marks left by the belt sander.
After the belt sander and orbital on high grit we touched up edges and corners with and hand sander.

Using a 80-120 grit sandpaper to get all the little nooks and carnies.
Still not wanting to strip a layer off our beautiful 1920's red oak floors we tried the coarsest sand paper we could get our hands on. While this worked in some areas where the finish had been worn down it still produced very similar results.
Hickory taking a break to check out the squirrels in the back yard.
Lindsey and Hickory setting up the lights so we could work late into the night.
We had no choice but to get a belt sander and strip the top layer off our floors. This was an even louder job than the orbital sanders. To start we had to run the belt sander across the floor at a forty-five degree angle in the room to even out the floor boards. Once the floor was even you can go across the floor with the woodgrain to strip the existing varnish. Once this was done we we swept the dust and used a pencil to mark all the areas that needed touched up. Because the belt sander is literally removing a layer from the wood if it sets in an area longer than others it has the ability to leave marks that will need worked out. We started first with very coarse sandpaper (40-60 grit) and worked our way up to a less abrasive ( 80-120 grit) sandpaper to get out the smaller impurities in the wood. This process was loud and messy and would not have got done with out my hardworking brother and sister-in-law coming out numerous days to help us!
After edges and rough areas were worked out with a hand sander it was time to stain. We worked with my family and our local Sherwin Williams store to find the exact color we needed to give our house that authentic look. Our final choices on stains were pickled oak and banister beige. Both of these stains have a little color in them, we chose these for that reason. The pickled oak has a white paint tint in it because we used it to tie in the variety off woods in the master and sunroom. There used to be a hall way in the master that was red oak running the width of the room the wall is down now and this wood connects to hickory planks running the opposite way. To help uniform this we used the pickled oak and it came out beautiful. The main level needed to be stained a color that matched the original trim, built ins and french doors that are throughout. Banister beige was almost a perfect match and I am truly pleased with the results. We get compliments often on how well the floor matches the original woodwork. The other reason for us picking stains there were not natural or just putting polyurethane right on the floors is we did not want to colors to change much or time or with sunlight.

The top coat we used on all our floors.
Applying the stain.

Banister beige is the stain color of our main floor in our house.

Pickled oak is the stain color in our master bedroom and upstairs sunroom.
Applying the stain.
After all the floors were sanded, we check for missed spots and marks. Then we sanded again and let the dust settle for at least a day and then it was a day of cleaning. Starting up stairs we worked our way down dusting, sweeping and wiping to remove all sawdust from the house. When this was completed we started staining. We worked in a system of one person putting the stain on and two of us working to wipe it evenly. After allowing the stain to dry we starting with the poly top coat. Using a foam roller we applied the top coat working carefully to get it evenly without any bubbles. ( When I say "we" I mean my Dad who is the woodwork master and helped coach us through this whole process) When the first coat was dried we did a light buffing/sanding and then applied a second coat. Then it was time to let it cure and and set before we moved into our new house!
If our house had a baby book one thing Trev would put in to remember would be the first soft surface! We worked so many hours that first month to get the floors done so we could move in. For that entire time the only thing to sit on besides the floor was buckets and sanders. After a great trip to Ikea with our friends we finally started bringing in furniture. Trev set up a leather chair and lamp from Ikea and declared it the first soft surface of the house! We did a happy dance.
My view when I wake up in the morning is this beautiful sunroom and the floors we worked so hard to refinish.
